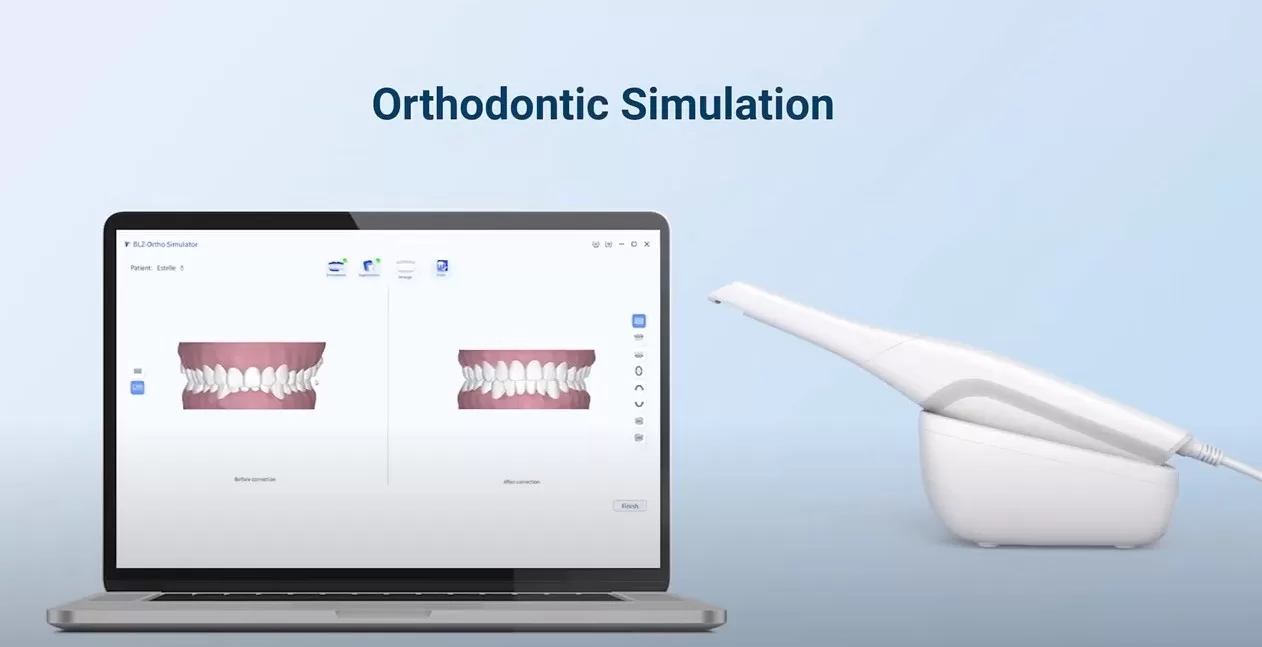
The use of intraoral scanner in clinics for orthodontics has increased over recent years. This scanning device can provide orthodontist or dentist with detailed images of the patient’s teeth and gums. An intraoral scanner with high accuracy and precision can offer accurate depiction of teeth and assist the orthodontists to make best treatment decisions. Here we’d like to introduce how to use BLZ Dental Intraoral Scanner to do orthodontic simulation step one by one.
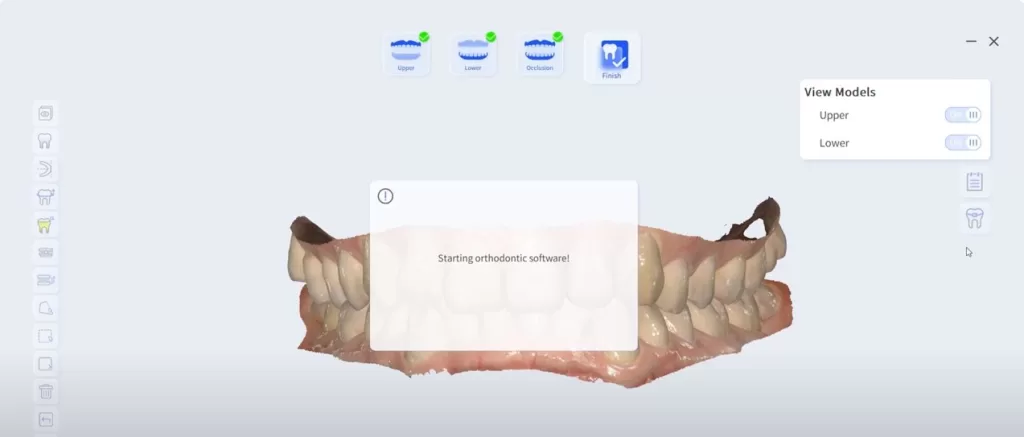
After finishing the whole intraoral scanning process, you will find the Ortho Simulator button, choose it and then enter the Ortho Simulator interface. The system will pop out a notice “Starting orthodontic software!”
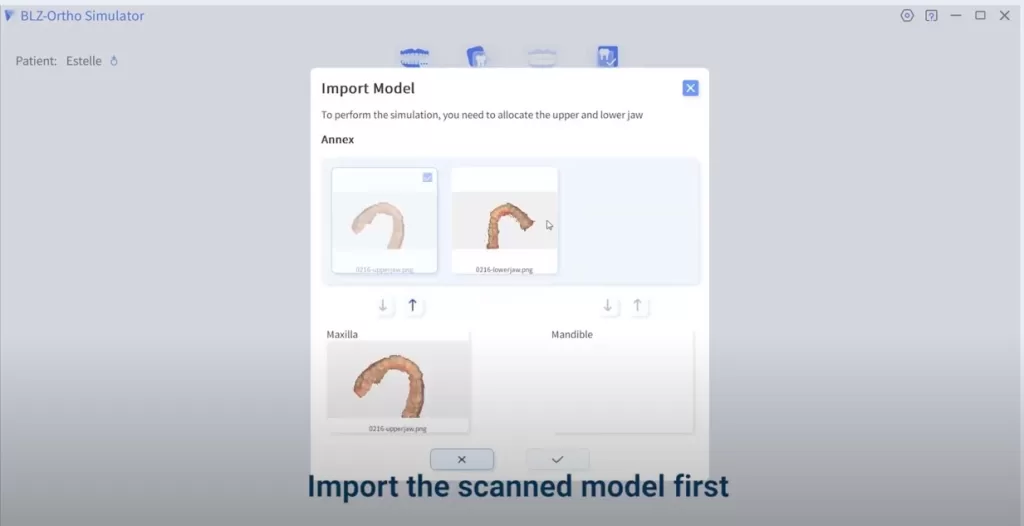
In the Ortho Simulator interface, click the “Start a new project” to import a scanned model file.
Workflow 1: Pretreatment
After importing the scanned model, you will find a button of Coordinate the adjustment, click it to adjust the coordinate.
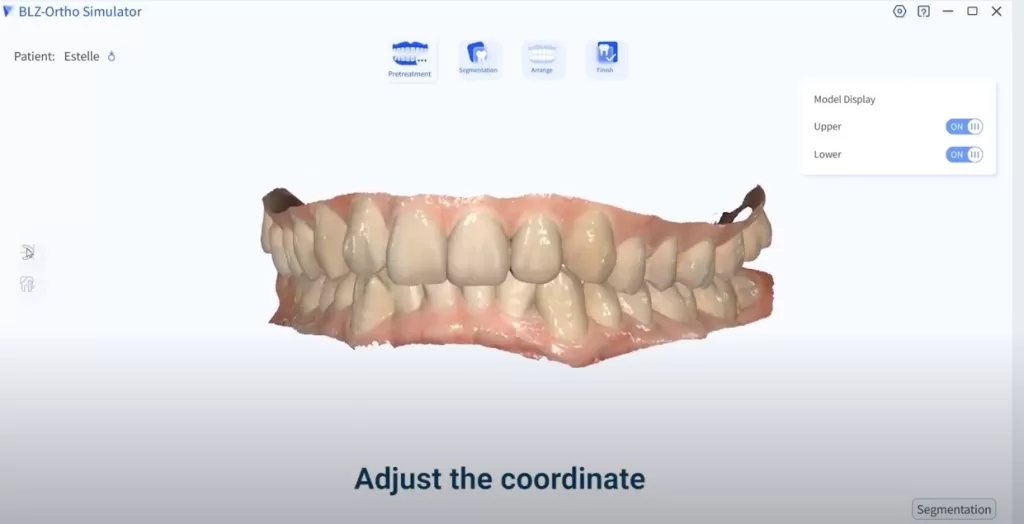
Below the Coordinate adjustment button, you can find the Model modification. You can check the model to modify it and reduce the data size. So the model can be processed faster.
Workflow 2: Segmentation
After finishing the whole process of Pretreatment, click the Segmentation button to enter the next step.
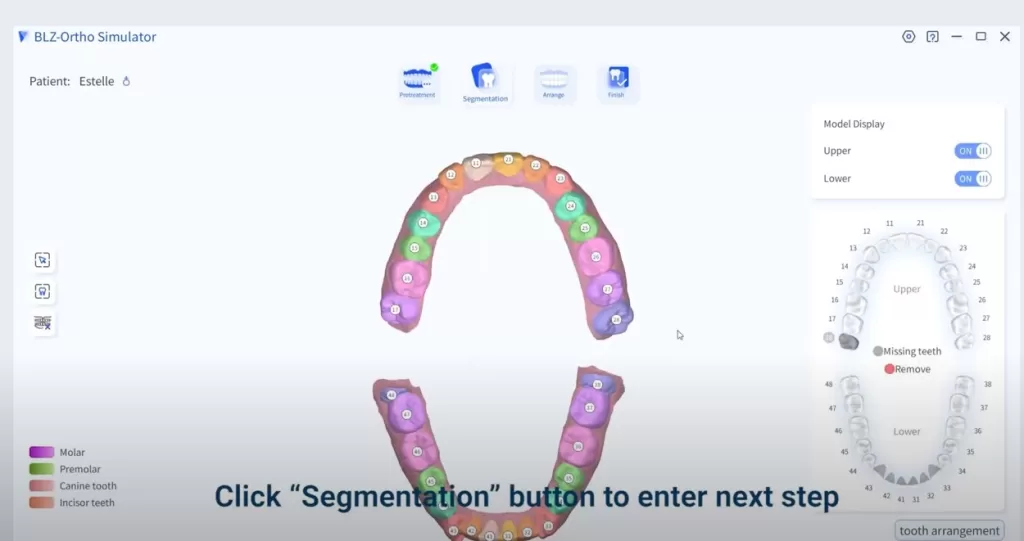
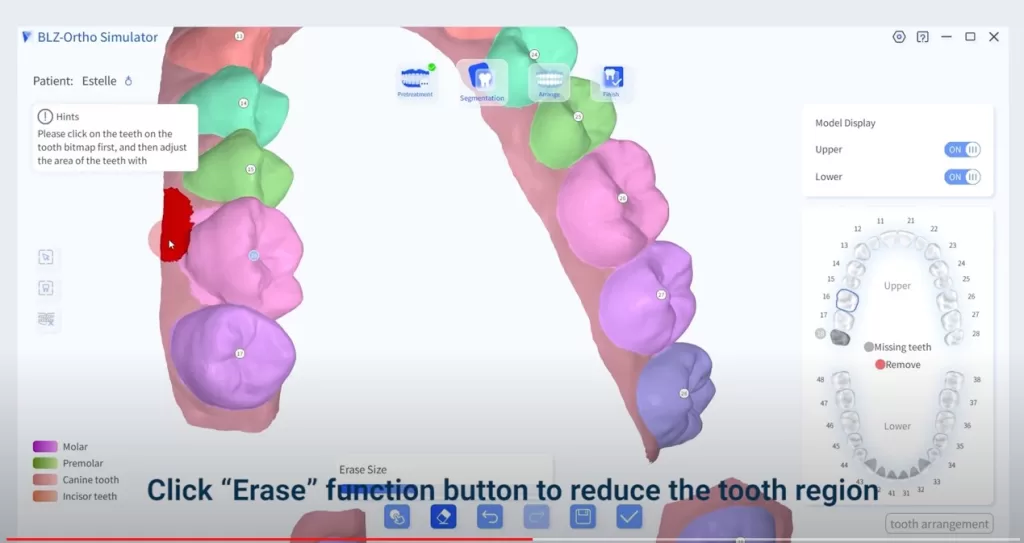
You can use the 3 buttons from the tool bar to start segment. The first button is Regional adjustment, click it to edit the model. Firstly, do regional adjustment for the teeth according to the needs. Choose the tooth that you need to adjust on the booth bitmap. You can click the Daub function button to expand the tooth region.

Next to the Daub button is the Erase function button. Use it to reduce the booth region. After that just click the save button to save the regional changes of this tooth.
The 2nd button on the left middle interface is Tooth number. You can use it to modify the tooth number according to needs. Click the booth that need to be modified on the model and arrange the booth number.
Thirdly, use the 3rd button of Extract a tooth to extract and delete the teeth that are with no use.
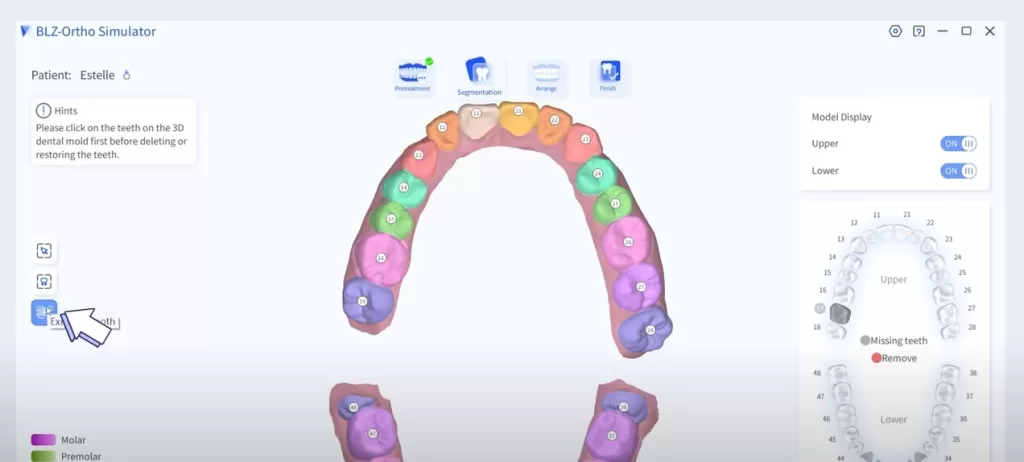
In the tooth bitmap, choose the teeth that need to be removed and click the Delete function button. Then click tooth arrangement button to enter the next step.
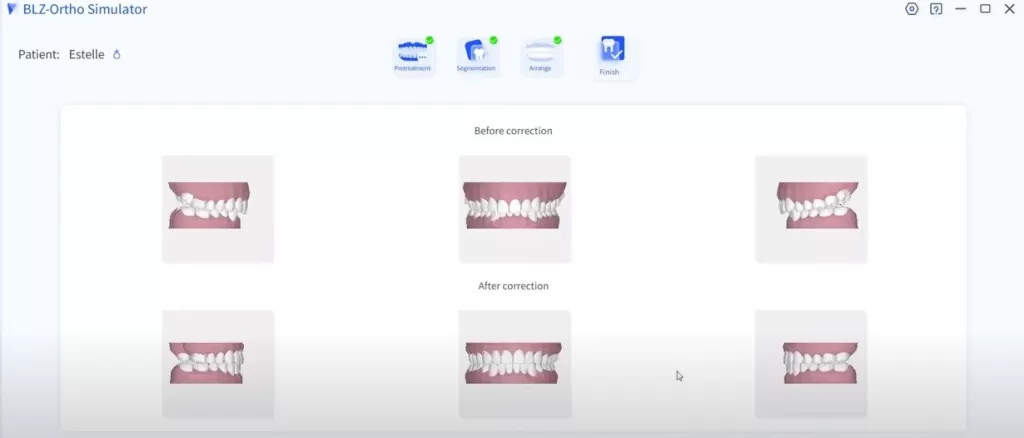
Workflow 3: Arrange
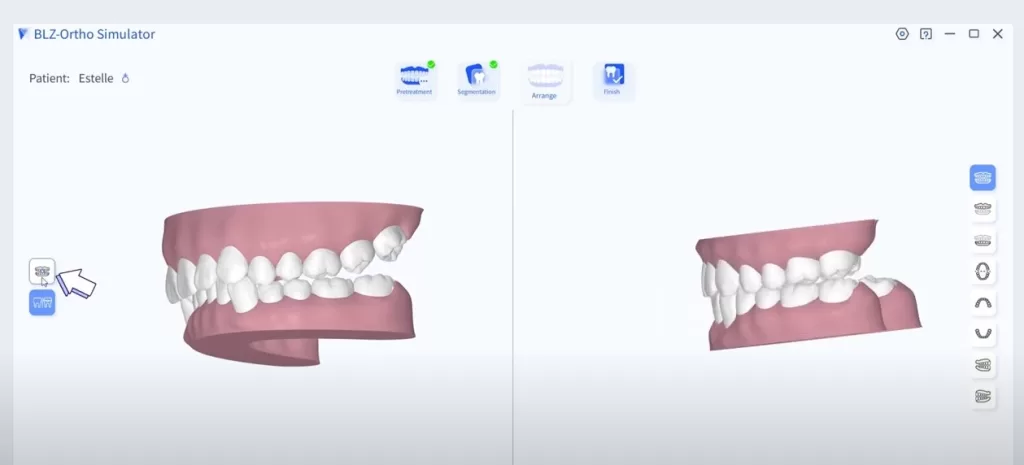
In the current Ortho Simulator interface, you can find the Occlusion Detection function button in the left middle side, just click it to check the occlusion relationship. You can expand the model arches to check and get the distance data between upper arch and lower arch. You can also check from different view angles.
Once all the steps have done, click Finish button to accomplish the whole workflow of orthodontic simulation.
In the Finish interface, you will get an exported file about the orthodontic simulation by clicking the button of Export.